

How To Make Car Window Shades
By Ethan Maurice | Dec 21, 2017
A couple weeks ago, I finished converting my Honda Element into the globe'due south tiniest home on wheels. As a dude who travels with lilliputian interior design experience, the conversion came out improve than I could accept imagined.
Ane of the main features that took my Element from livable to friggin' sugariness are its patterned material blackout windows. Made with a shiny, insulating cloth called Reflectix, almost projects using this material end up experience similar the inside of a low upkeep spaceship. I wanted a more homey, bright look to my space that didn't feel quite so shoddy or depressing. Patterned fabric, adhesive spray, and black duct tape proved the perfect solution.
In addition to looking great on the inside, these window shades coma nearly all outside light. They also brand information technology impossible to see into my Element, I can comfortably sleep, with complete privacy, anywhere I'chiliad allowed to park.
I figured it worthwhile to explain how I fabricated my coma window shades for anyone else trying to overcome the universal hurdles of comfortably sleeping in a vehicle.
The DIY Beautiful Blackout Window Shade Build Process:
Supplies:
-
Big Sheets of Paper-thin (Enquire a local bike store for a free, leftover bike box)
-
Reflectix Insulation (25-ft Gyre is perfect corporeality for Honda Element)
-
Crawly Patterned Fabric (Check Joann Fabrics or Hobby Foyer, I used 4 yards)
-
Matte Black Spray Paint (I used three cans, less than $1 at Home Depot)
-
Adhesive Spray (A tin can should practice, maybe two for a van with large windows)
-
Maximum Strength Black Duct Record (Apply the kind made by Gorilla Glue)
-
Velcro Agglutinative Squares
Disclosure: Some of the above supplies are affiliate links. At no boosted cost to you, I'll earn a committee if you click through and buy something.
Tools:
-
Heavy Duty Scissors
-
Tape Measure
-
Permanent Marker
The Procedure:
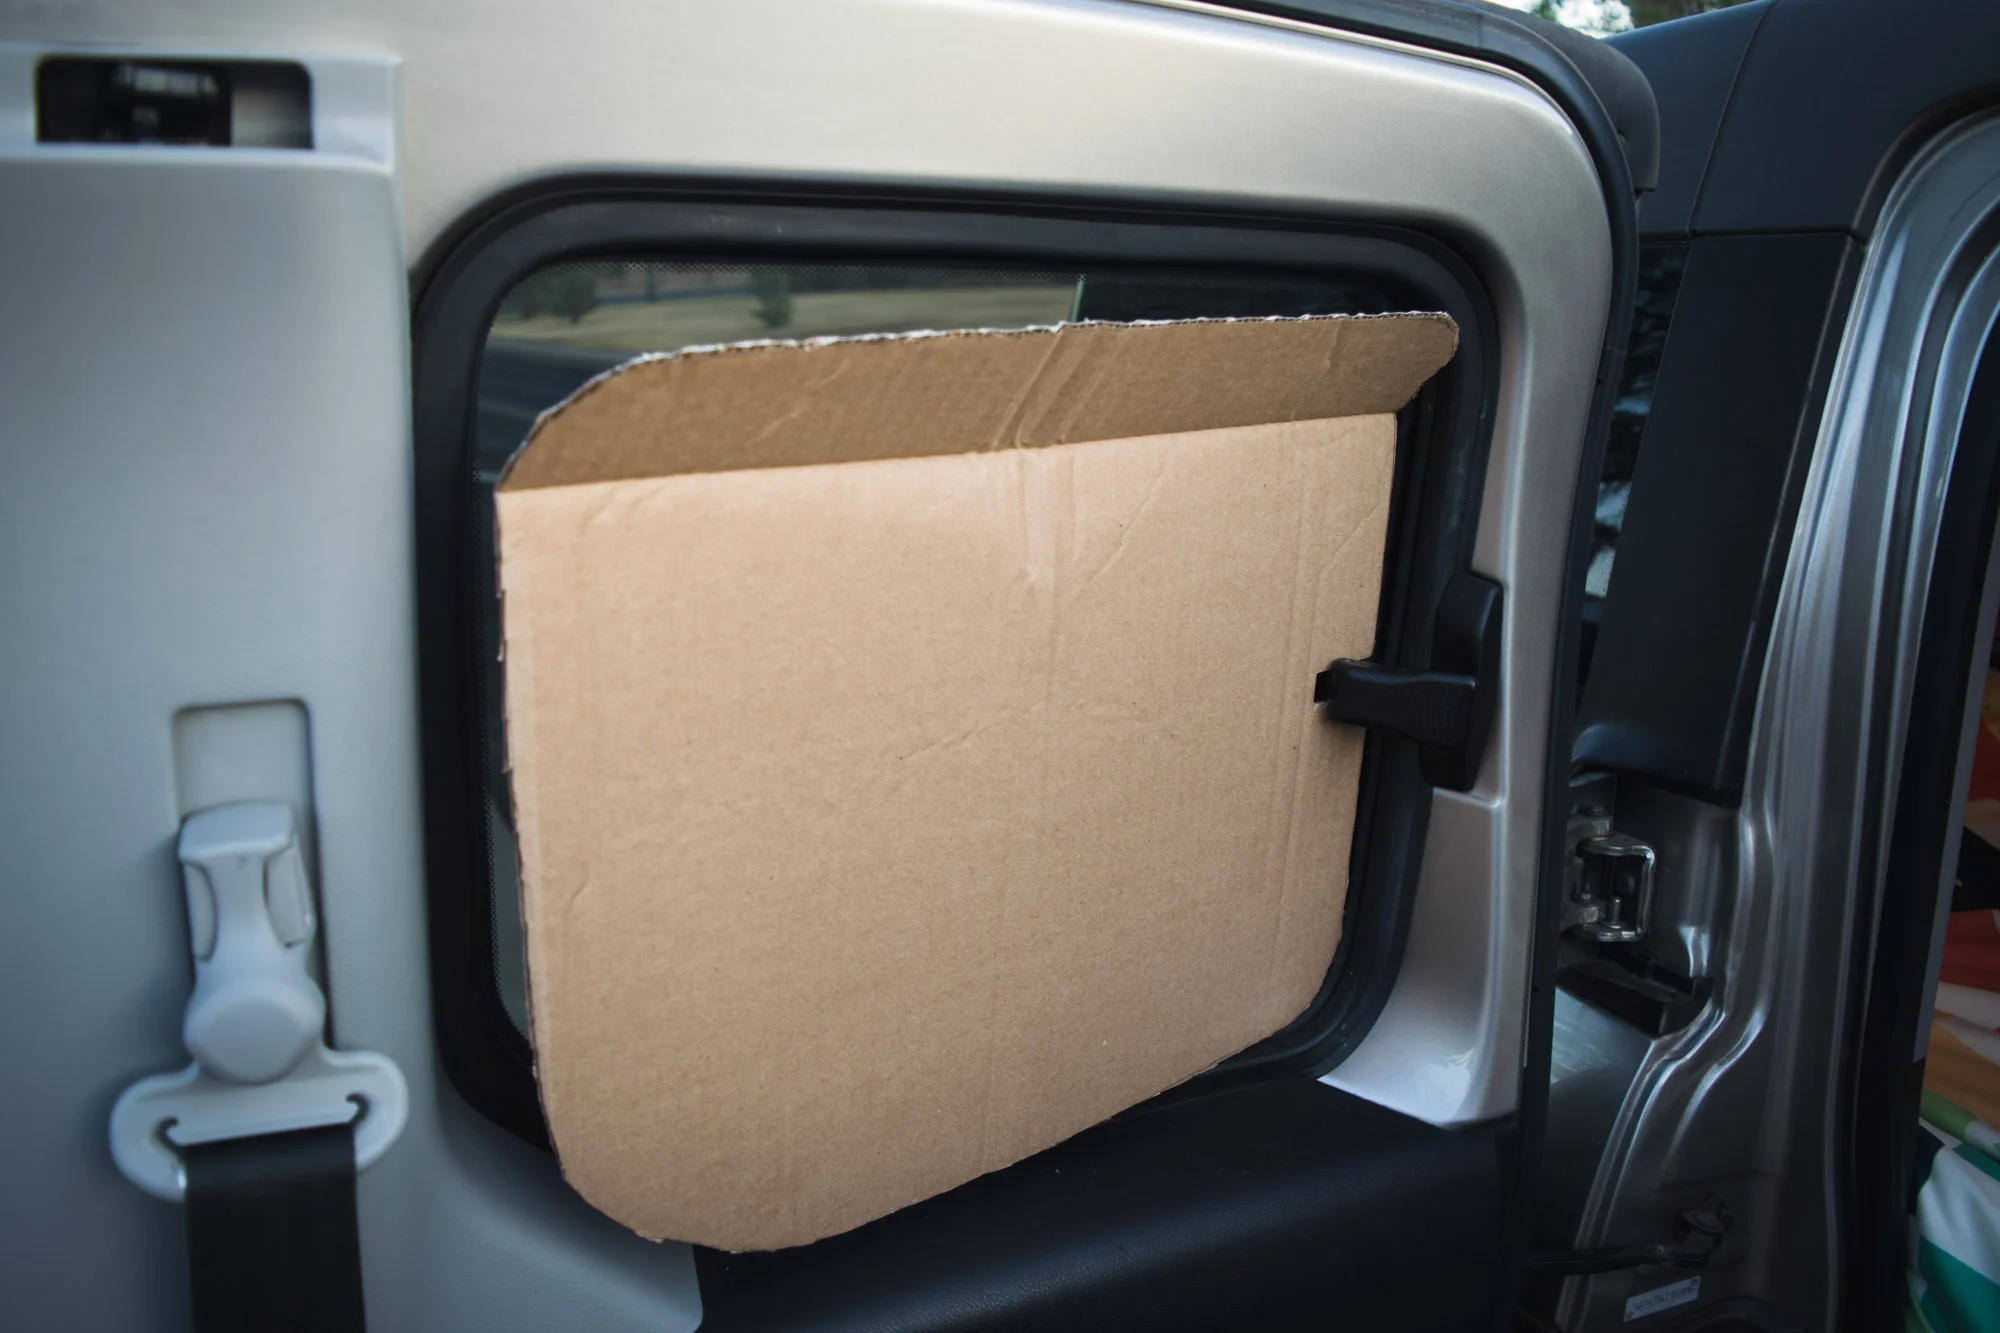
i. Mensurate a window, length x superlative with tape mensurate. Cut a cardboard piece with an boosted inch or two added to those dimensions (cut away extra fabric is a million times easier than taping information technology dorsum on).
2. Take your cardboard piece, those heavy duty scissors, and the permanent marker into your vehicle. Hold the paper-thin upward confronting the within of the window. Mark a bit less than y'all think you should take off a corner. Cut it off. Echo until cardboard fits snug into the recessed area of the window (the discussion "snug" is primal if y'all want window shades to remain in windows).
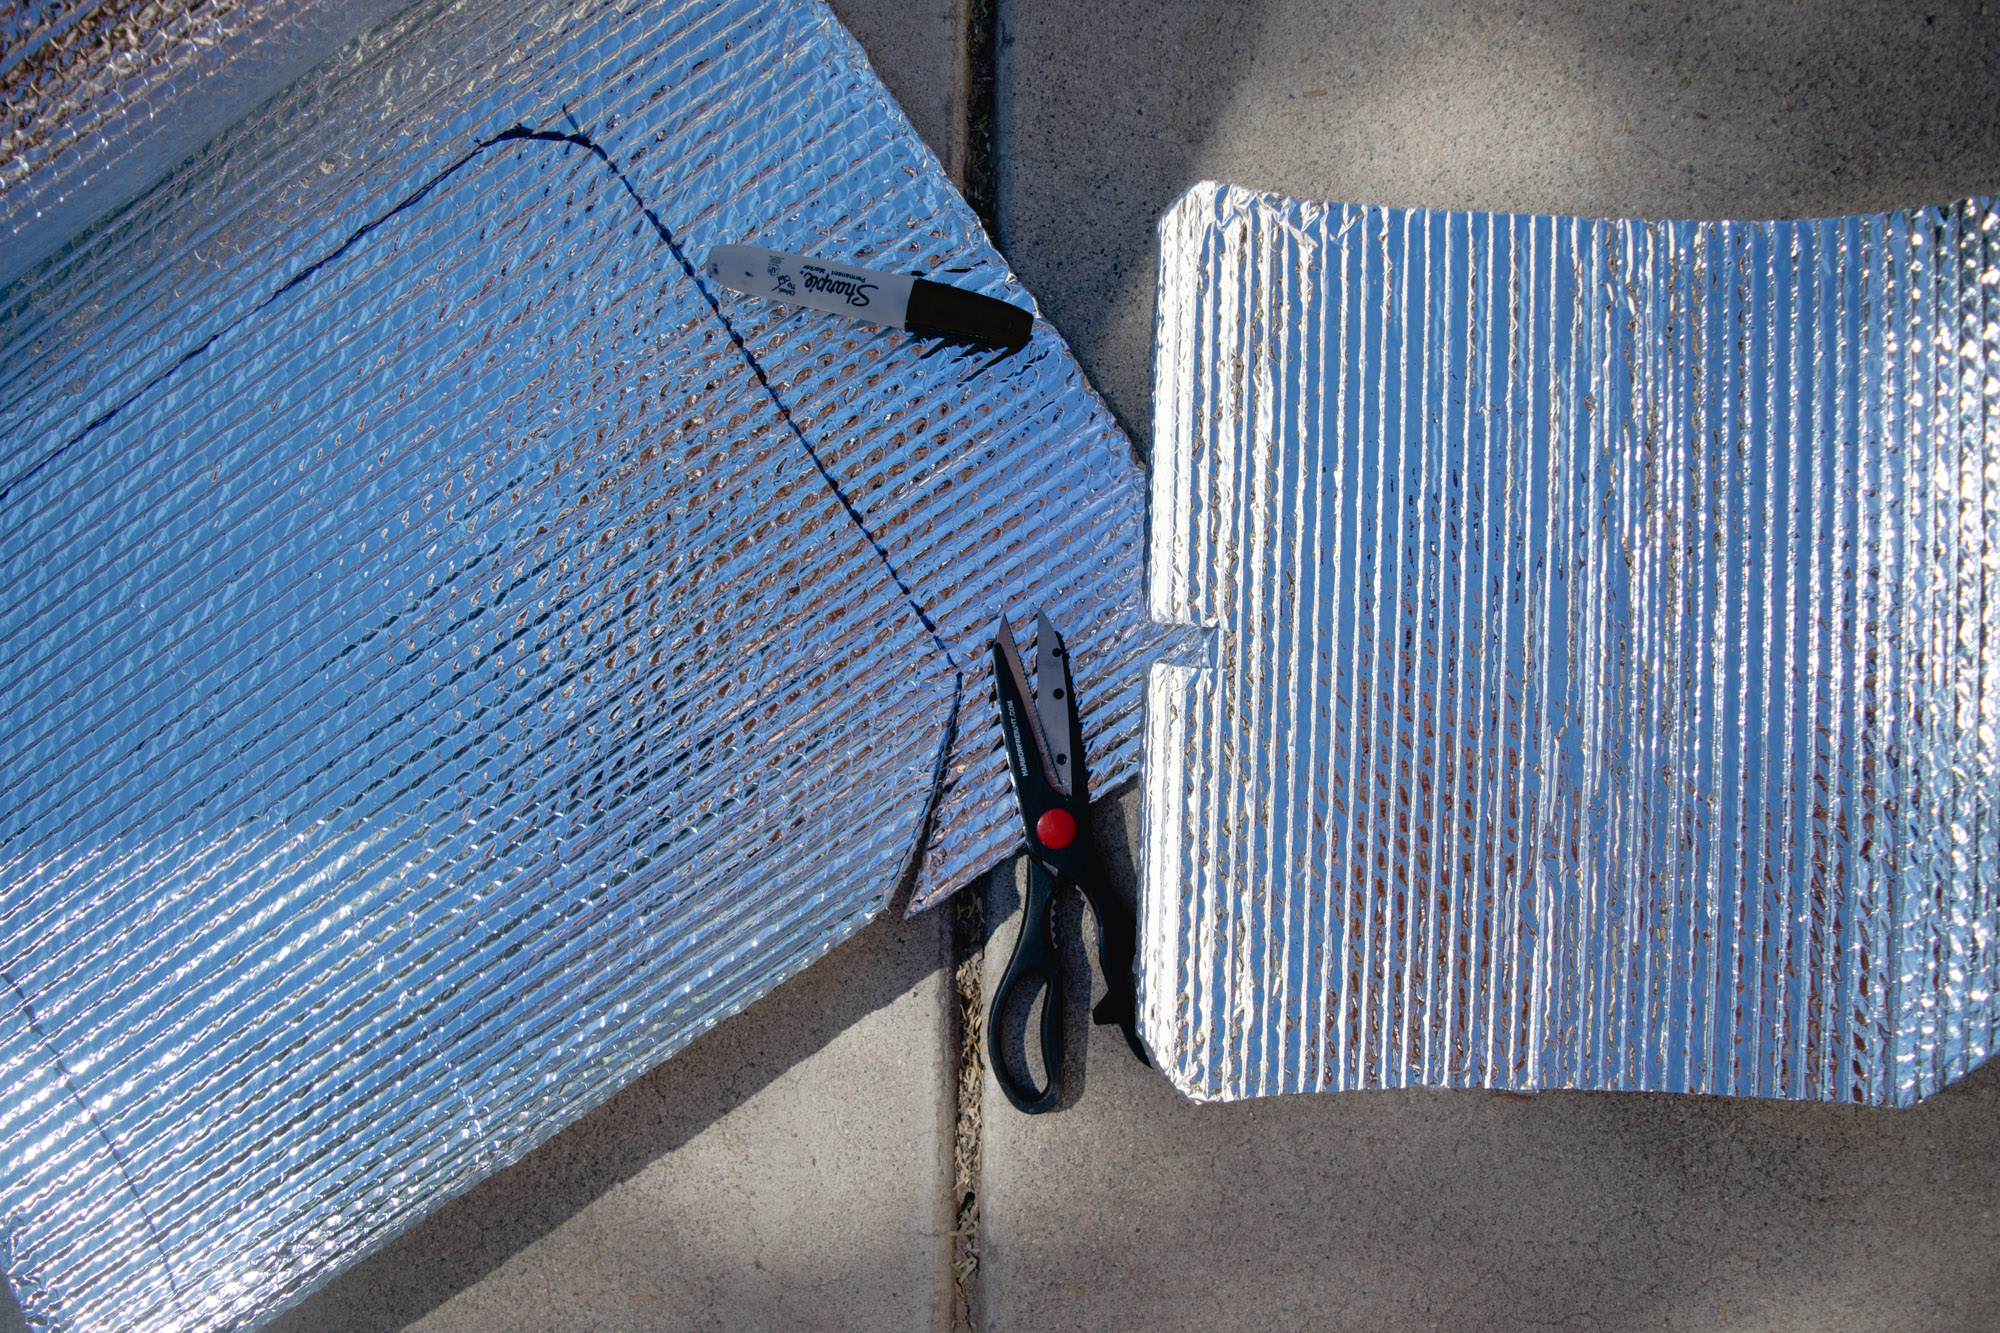
3. Trace cardboard on Reflectix fabric. Cut it out, slightly larger (again: cutting away extra material is a million times easier than taping it dorsum on). Push Reflectix piece into that aforementioned window and trim to achieve a snug, uncrinkled fit. If not snug, window shade volition not stay in window!
4. Echo Steps 1 to iii for every window.
Pro Tip: Windows on the sides of your vehicle come in pairs! Just trace your first window shade and cut it out (slightly larger, and and so trim to verbal size) to salvage time.
5. Once you lot have all your window shades cut to size, coat outward facing side with matte black spray paint. To make certain you don't spray the wrong side, put each slice in its window and mark the outside with permanent marker as you take them down. Permit paint dry before continuing.
An update: You lot can skip this step, only I highly recommend it. Spray painting your window shades black will make sleeping in your vehicle mode more stealth! Information technology is truthful that Reflectix is silver to reflects light (and thus, heat). But information technology is also true that filling all of your windows with reflective silver will make your vehicle stand out like a suspicious sore thumb! Don't worry, they nonetheless function as an insulator. Also, mine accept been spray painted black for about ii and a half years now and however look great.

six. Spread out your beautiful curl of patterned cloth. Place all window shades black-side-up on textile (consider pairs of windows and the direction the pattern is going on each piece for when you lot really put them up in your windows). Trace each window shade onto fabric with permanent marker and cutting out all fabric pieces.

7. Comprehend the silver side of window shade in Agglutinative Spray. Wait until tacky. Stick and press matching fabric slice on.

8. Utilize maximum strength duct tape, hot-dog-fashion, effectually edges of window shade to secure fabric. To make this look skilful, align each slice of duct tape with its previous slice on the cloth side (you won't run into black side of window shade). Use long pieces of duct tape on straightaways and curt pieces on curves.

nine. If you've used a potent, quality duct record, similar the kind made by Gorilla Gum, yous're done! Whoo! If, like me, you bought cheap, knock-off duct tape and information technology's starting to peel up, you're in for a long process of getting the duct record actually hot with an iron to aid it adhere better (use a scrap piece of fabric betwixt the iron and tape so it doesn't burn). Trust me, you don't bother with this step—go quality record.
x. Put window shades upwards and curiosity at your artistic prowess:
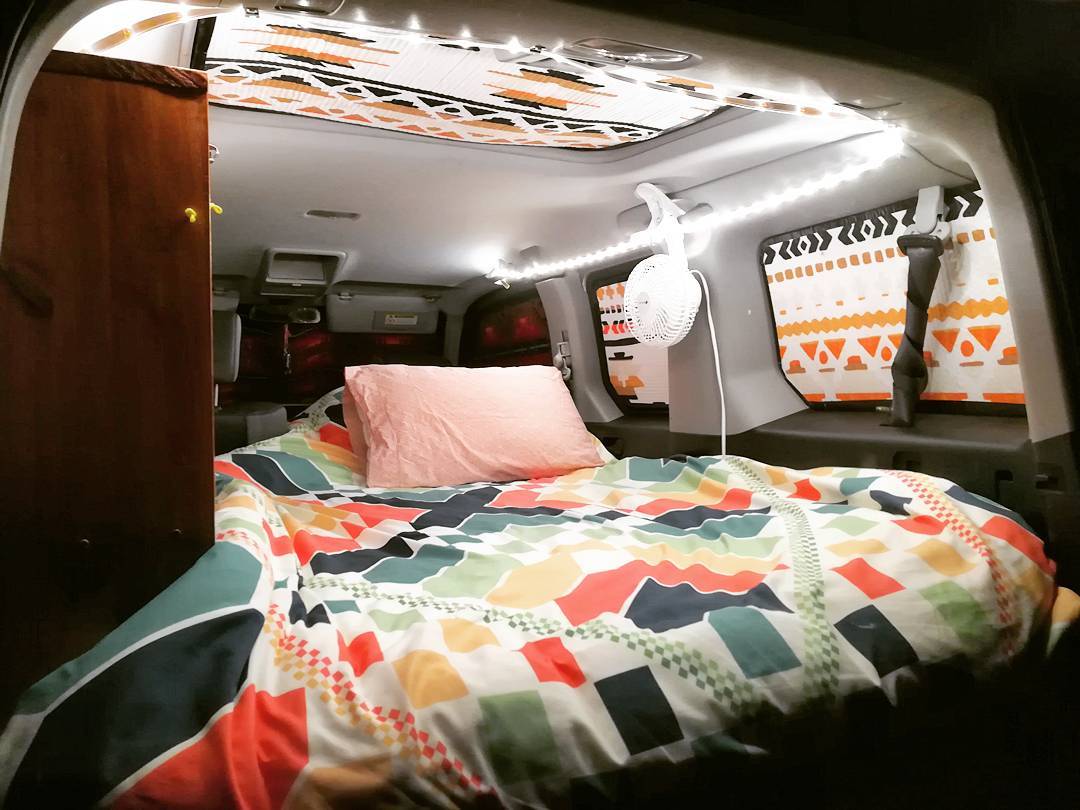
Update: After a few months of living in my Element, I added velcro adhesive squares to a couple of panels that didn't fit every bit snug as others. They've worked remarkably well:


Resonate with this? If so, I ask y'all to press 1 of the share buttons on your screen! I also invite y'all to connect with me on Facebook , Instagram , and Twitter .
Source: https://ethanmaurice.com/blog/how-to-make-blackout-window-shades-for-a-camper-van-or-element
Posted by: hairstonalreend38.blogspot.com
0 Response to "How To Make Car Window Shades"
Post a Comment